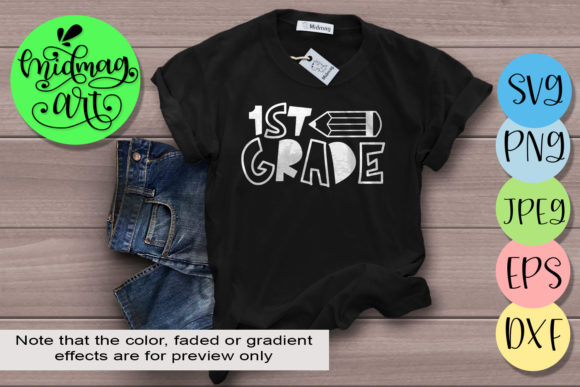
Getting the Most from Your 1st Grade Back to School SVG Digital File
Preparing for a new school year is a busy time. Whether you are a parent crafting a special first-day shirt, a small business owner creating products for your shop, or a teacher decorating a classroom, the right digital file can make all the difference. A 1st Grade, Back to School digital zip file offers everything you need to create professional-looking projects. But using these files effectively requires more than just clicking download. Many people run into avoidable issues that waste time, material, and money. Let us walk through the common misunderstandings and practical ways to get great results every time.
What Exactly Is Inside That Zip File?
When you purchase a 1st grade svg or back to school svg bundle, you receive a compressed folder containing five distinct file formats. The zip file includes an SVG file, a DXF file, an EPS file, a PNG file with a transparent background at 300 dpi, and a high-resolution JPEG at 300 dpi. Each format serves a specific purpose. The 1st Grade, Back to School set is designed for Cricut Explore, Silhouette Designer Edition, Adobe Suite, Inkscape, Corel Draw, and many other programs. The variety of formats means you can work with whatever software or machine you already own.
One mistake beginners often make is assuming all the files are interchangeable. They are not. The SVG file works beautifully for Cricut users and most vector editing software. The DXF file is ideal for Silhouette users, especially those using the free basic edition of Silhouette Studio. The EPS file is best for professional graphic design programs like Adobe Illustrator. The PNG and JPEG files are raster images perfect for printing on items like mugs, wall art, and tote bags. Understanding which file to use for which task will save you frustration later.
The First Mistake: Choosing the Wrong File Format
A frequent error happens when someone opens their cutting machine software and loads the wrong file type. For example, trying to use the JPEG or PNG file in Cricut Design Space for a cut project will not work well. Those formats are meant for print projects, not for creating cut lines. The software may let you upload the image, but you will struggle to separate the design into individual cut layers. The result is either a messy cut or a project that does not look right.
Another common misunderstanding involves the DXF file. Many Silhouette users do not realize that the free version of Silhouette Studio can open DXF files but not SVG files. If you try to open an SVG in the free Silhouette software, it will likely fail or display incorrectly. Choosing the DXF option from the 1st Grade, Back to School set will give you a smooth experience. For Cricut users, stick with the SVG file. For print projects like wall art or tote bags, use the high-resolution PNG or JPEG.
The better approach is to check which software you use before unzipping. If you own a Cricut, place the SVG file in a dedicated folder. If you use Silhouette with the free software, save the DXF file separately. Label your folders clearly. This small habit prevents the frustration of hunting for the right file later.
Overlooking Resolution and Transparency
Another overlooked detail is the importance of resolution. The PNG and JPEG files in the back to school svg package come at 300 dpi. That is the industry standard for high-quality printing. Some people download the files and immediately print at a low resolution setting, not realizing their printer or software may default to 72 or 150 dpi. The result is a blurry or pixelated design on a mug or shirt. Always check your print settings before hitting print. Set the resolution to 300 dpi and ensure the image is scaled correctly for your project.
The PNG file also has a transparent background. This is essential for projects where you want the design to sit cleanly on a colored surface. If you use a JPEG for a shirt design, you may end up with a white box surrounding the artwork, which looks unprofessional. Use the PNG for print projects that need a transparent backdrop. Use the JPEG for projects where a solid white background works fine, such as flyers or posters.
The Trap of Unorganized Files
When you download a 1st grade svg set, the zip folder contains multiple files. A common mistake is leaving them all in the Downloads folder and trying to work directly from there. This leads to confusion, accidental deletion, or using the wrong version. It is much better to create a dedicated project folder on your computer. Name it clearly, for example, Emma_1st_Grade_First_Day. Inside, place the SVG file if you are cutting with a Cricut, or the DXF if you are using Silhouette. Keep the PNG and JPEG files handy for any print projects you plan later.
Some users also forget to unzip the files before trying to upload them. If you try to load the entire zip folder into Cricut Design Space, it will not recognize the contents. You must extract the files first. On a Windows computer, right-click and select Extract All. On a Mac, double-click the zip file. This simple step is one of the most common overlooked details for beginners.
Understanding Licensing and Usage Rights
This point often catches small business owners off guard. When you purchase a back to school svg digital file, you are typically buying a license to use the design for personal or limited commercial purposes. The exact terms vary by seller. Many allow you to create physical products to sell, such as t-shirts, mugs, or tote bags. However, they usually do not allow you to resell the digital file itself or share it with others. Some licenses have caps on the number of items you can produce or require attribution.
A mistake entrepreneurs make is assuming all licenses are the same. They buy a file, start selling products, and later discover they violated the terms. This can lead to a takedown notice or legal issues. The practical advice here is simple. Read the product description carefully before purchasing. Look for phrases like commercial use allowed or personal use only. If the license is unclear, contact the seller directly. A quick message can save you from a costly mistake.
For hobbyists creating gifts for family and friends, most standard personal use licenses cover your needs perfectly. You can make shirts, bags, and decorations without worry. Just avoid sharing the actual digital files online or with others who have not purchased their own copy.
Rushing the Design Process
When you open a 1st Grade, Back to School design in your software, a common impulse is to start cutting or printing immediately. This is where many small mistakes creep in. Take a moment to check the size. Many digital files default to a certain size that may not match your blank shirt or mug. If you cut a design at its default size without resizing, you might end up with something too small or too large for the intended surface.
Another issue is forgetting to mirror or flip the design when using heat transfer vinyl. This is one of the most repeated errors for beginners working with an back to school svg. If you cut a design for iron-on transfer without mirroring it, the final image will appear backwards. Always mirror your design before cutting if you are using heat transfer vinyl. If you are using permanent vinyl for a mug or sign, mirroring is usually not needed. Know the difference before you press.
Take the time to do a test cut or test print on plain paper or cheap vinyl first. This catches sizing and placement errors before you waste expensive materials. It also lets you confirm that the design layers align properly. For SVG files with multiple colors, check that each layer corresponds to the correct color in your software. Misaligned layers lead to a messy final product.
Overlooking Your Machine's Capabilities
Not all cutting machines handle every file type equally. The 1st grade svg files in this set are well-made and tested with popular machines, but your specific device may have limitations. For example, older Cricut models may not handle extremely intricate designs with very thin lines. The same applies to some Silhouette machines. If you try to cut a very detailed design with tiny text or thin strokes, the material may tear or lift.
The practical fix is to review the design before cutting. Zoom in to see if there are any very thin elements. If you are cutting on a textured or stretchy material like a t-shirt, consider simplifying the design or using a sturdier backing. You can also adjust the cut settings in your software to reduce pressure or increase blade depth for different materials. Always consult your machine's material guide for recommended settings.
Another overlooked detail is the size of the design relative to your mat. A full-page design may not fit on a standard 12x12 mat if it has wide margins or bleeds. Preview the layout in your software before cutting. Adjust the size or orientation as needed to avoid wasting material.
Ignoring the PNG and JPEG for Non-Cut Projects
Many people focus entirely on the vector files for cutting and forget that the PNG and JPEG files are just as valuable. The 1st Grade, Back to School package includes a PNG with a transparent background at 300 dpi and a high-resolution JPEG at 300 dpi. These are perfect for print-on-demand platforms, digital invitations, classroom signs, and social media graphics. If you are creating a first-day-of-school sign for a photo booth, the PNG file is ideal. You can place it over any background without a white box.
Teachers and educators often overlook these formats when decorating classrooms. You can print the JPEG or PNG on cardstock and frame it, or use it on a bulletin board. The high resolution means it will look crisp even at larger sizes. Do not limit yourself to cutting. Think about all the ways a design can be used across print, digital, and physical media.
Mismatching the Design to the Audience
When selecting a back to school svg, be thoughtful about who will see and use it. A design meant for a first grader should be cheerful, age-appropriate, and readable. Avoid overly complex or cluttered designs that might confuse young children. The best choices feature clear text, friendly graphics, and bright colors. If you are creating products to sell, consider what parents of first graders would actually want to dress their child in or display in their home.
Some designers make the mistake of using trendy fonts that are hard for young children to read. Cursive or heavily stylized text may look pretty but fails as a functional design on a child's shirt. A first grader wants to be able to recognize their grade level and name. Stick with bold, clean fonts that are easy to read from a distance. This also helps with cutting, as simpler fonts weed more cleanly from vinyl.
Final Checks Before You Create
Before you start any project with your 1st grade svg or back to school svg digital file, run through a quick checklist. Confirm that you have extracted the files from the zip folder. Select the correct file format for your software and machine. Check the resolution and print settings if you are printing. Mirror the design if you are using heat transfer vinyl. Do a test cut or print on scrap material. Verify the licensing terms if you plan to sell the finished items. Then proceed with confidence.
The beauty of a well-prepared digital file is that it removes guesswork from your creative process. The 1st Grade, Back to School package gives you versatile formats that work across machines and projects. By avoiding the common mistakes around file selection, resolution, organization, licensing, and preparation, you will save time, reduce waste, and create items that look polished and professional. Whether you are making a single shirt for your own child or producing inventory for a small business, the right preparation turns a simple download into a finished product you can be proud of.
Take a few extra minutes to set yourself up correctly. Your future self will thank you when the design cuts cleanly, presses perfectly, and brings a smile to a new first grader on their big day.